Basics
Glitter in Moonray is made as a shader lobe. Instead of using maps or textures, glitter settings belong to the material level, to create a procedural effect: metallic flakes in reference or object space that face random directions.
Since this is a procedural effect, texture issues like resolution or mipping are not a consideration. A user can zoom into glitter and see full detail, and the lobe handles filtering when flakes become too small for the pixel footprint.
Glitter can display on any blended Dwa material, but its settings are found in the following materials:
- DwaBaseMaterial
- DwaSolidDielectricMaterial
- DwaMetalMaterial
- DwaSkinMaterial
- DwaFabricMaterial
- DwaVelvetMaterial
Basic Options and Styles
Glitter is activated by the show_glitter parameter. The glitter parameter acts as a 0 to 1 opacity for the lobe, which helps while layering.
The number of flakes per area is controlled by glitter_density.
Essentials like color, roughness, and flake size are duplicated across A and B Styles, e.g. glitter_color_B. This allows users to have totally distinct types of glitter procedurally generated within the same material. The style of each flake is randomly selected using the relative weights of the parameters glitter_style_A_frequency and glitter_style_B_frequency. By default, glitter_style_B_frequency is 0.0 so only style A is displayed.
Both styles can also use a texture, instead of the default circular flake shape.
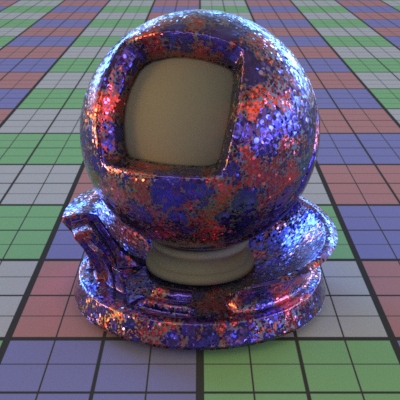
Left: baseline right: adding some larger, rougher blue flakes
local twoStyles = DwaMetalMaterial("/Scene/surfacing/mtl/twoStyles") {
    ["metallic_color"] = Rgb(0.2, 0.21, 0.3),

    ["show_glitter"] = true,
    ["glitter_space"] = "object",
    ["glitter_density"] = 12.0,

    ["glitter_style_A_frequency"] = 1.0,
    ["glitter_size_A"] = 0.1,
    ["glitter_color_A"] = Rgb(0.15, 0.1, 0.8),

    ["glitter_style_B_frequency"] = 0.01,
    ["glitter_size_B"] = 0.3,
    ["glitter_roughness_B"] = 0.5,
    ["glitter_color_B"] = Rgb(0.15, 0.1, 0.8),
}
Variation
Glitter has a number of options to provide more randomized effects, which are active across both styles:
- glitter_seed determines the seed of the random number generator
- glitter_randomness changes the random orientation of each flake
- glitter_texture_orientation_randomness determines range of random rotation for texture UVs
- glitter_hue_variation, glitter_saturation_variation, and glitter_value_variation randomize color.
- glitter_jitter changes the arrangement of flakes; 1 (default) is cell noise while 0 conforms to a grid
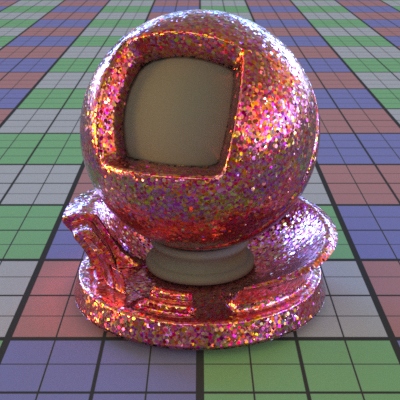
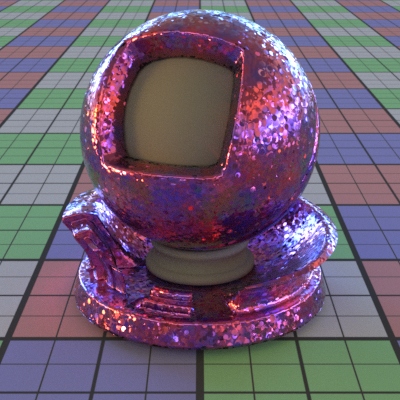
Left: baseline, right: using hue, saturation, value variation
local variation = DwaMetalMaterial("/Scene/surfacing/mtl/variation") {
    ["metallic_color"] = Rgb(0.2, 0.21, 0.3),

    ["show_glitter"] = true,
    ["glitter_space"] = "object",
    ["glitter_density"] = 12.0,

    ["glitter_style_A_frequency"] = 1.0,
    ["glitter_size_A"] = 0.1,
    ["glitter_color_A"] = Rgb(0.15, 0.1, 0.8),

    ["glitter_color_hue_variation"] = 0.25,
    ["glitter_color_saturation_variation"] = 0.25,
    ["glitter_color_value_variation"] = 0.25,
}
Additive Glints
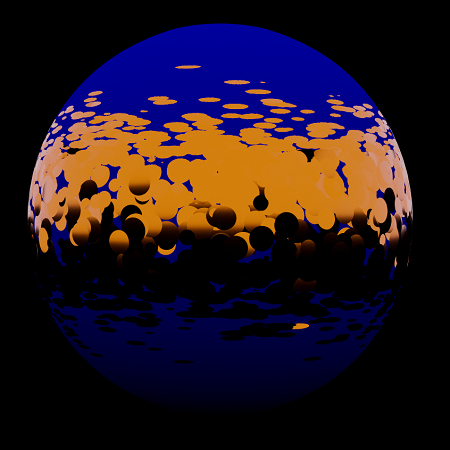
The glitter_layering_mode parameter has two options: physical (default) and additive. The additive mode is a non-photoreal mode where glitter isn’t energy conserving, and only adds to material reflection instead. This is useful for representing phenomena like glints on snow.
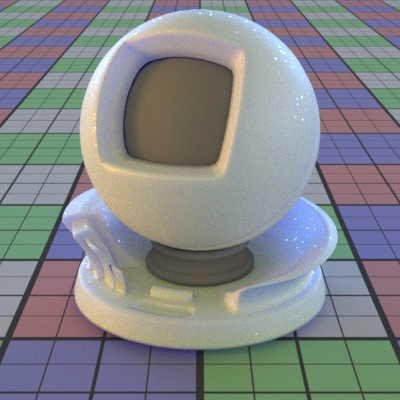
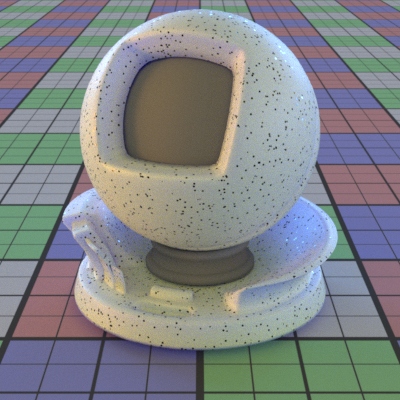
Left: physical blending causing black spots, right: additive blending creating glints
local mtl = DwaSolidDielectricMaterial("/Scene/surfacing/mtl/mtl") {
    ["albedo"] = Rgb(0.78, 0.78, 0.78),
    ["scattering_radius"] = 0.5,
    ["scattering_color"] = Rgb(0.05, 0.07, 1.0),
    ["bssrdf"] = "random walk",

    ["show_glitter"] = true,
    ["glitter_layering_mode"] = "additive",
    ["glitter_space"] = "object",
    ["glitter_density"] = 5,

    ["glitter_size_A"] = 0.05,
    ["glitter_roughness_A"] = 0.05,
    ["glitter_color_A"] = Rgb(0.01, 0.01, 0.01),
}
Ordering
DwaMaterials have a fixed topology, or lobe ordering. Glitter renders atop all lobes except for clearcoat and fuzz. A naturalistic example is metallic car paint (specular, glitter, clearcoat, and fuzz as accumulated dust).
Blending
Glitter parameters use layering like all other Dwa materials, by blending options into the final material wherever possible. This section discusses useful layering tricks and limitations to be aware of.
Generally, options like color and roughness are always safe to blend, while options that change the shape of the flakes might create artifacts.
Layering One Style vs. Two Styles
When combining glitter materials, make sure to blend intentionally between one or two styles. If you want two distinct types of glitter with nothing in between, then two styles are needed.
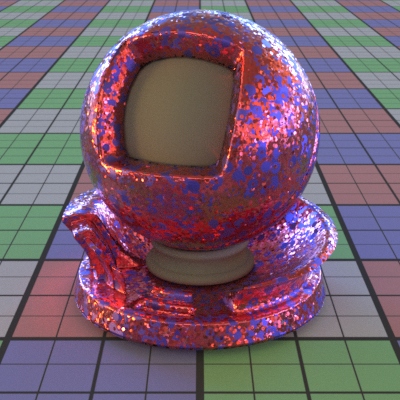
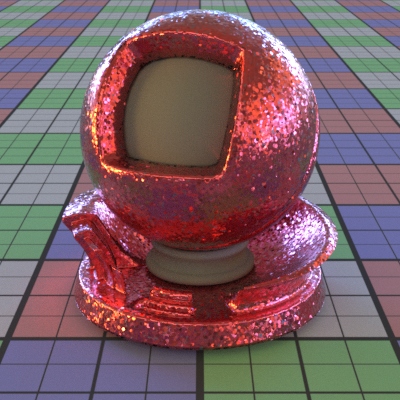
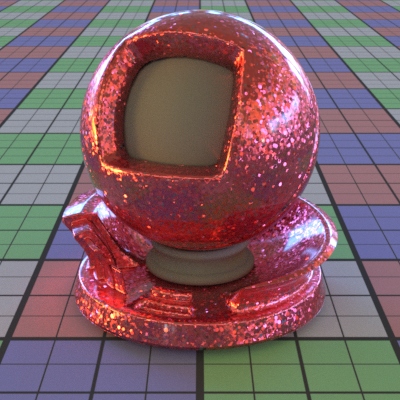
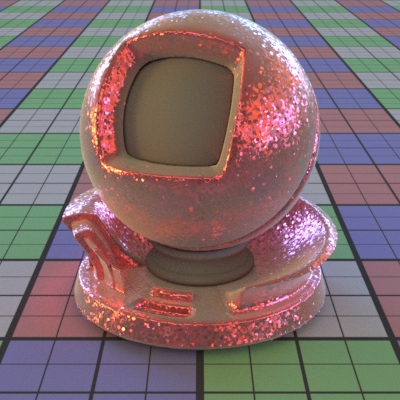
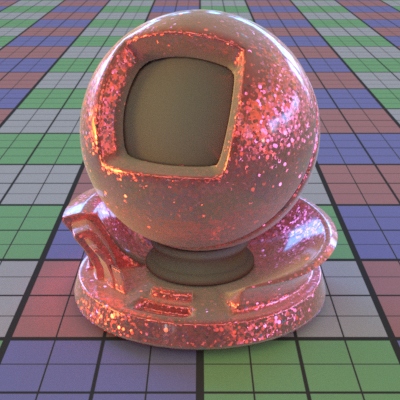
Here is an example showing the difference blending between red glitter and blue glitter:
Left: blending red and blue glitter into one style, right: blending across two styles using the same mask
Here is an example snippet of layering two styles with two materials:
local glitterA = DwaMetalMaterial("/Scene/surfacing/mtl/glitterA") {
    ["metallic_color"] = Rgb(0.2, 0.21, 0.3),

    ["show_glitter"] = true,
    ["glitter_space"] = "object",
    ["glitter_density"] = 12.0,

    ["glitter_style_A_frequency"] = 1.0,
    ["glitter_size_A"] = 0.1,
    ["glitter_color_A"] = Rgb(0.8, 0.1, 0.15),

    ["glitter_style_B_frequency"] = 0.0,
    ["glitter_size_B"] = 0.2,
    ["glitter_color_B"] = Rgb(0.15, 0.1, 0.8),
}

local glitterB = DwaMetalMaterial("/Scene/surfacing/mtl/glitterB") {
    ["metallic_color"] = Rgb(0.2, 0.21, 0.3),

    ["show_glitter"] = true,
    ["glitter_space"] = "object",
    ["glitter_density"] = 12.0,

    ["glitter_style_A_frequency"] = 0.0, -- swapped with B
    ["glitter_size_A"] = 0.1,
    ["glitter_color_A"] = Rgb(0.15, 0.1, 0.8),

    ["glitter_style_B_frequency"] = 1.0, -- swapped with A
    ["glitter_size_B"] = 0.2,
    ["glitter_color_B"] = Rgb(0.15, 0.1, 0.8),
}

local mtl = DwaLayerMaterial("/Scene/surfacing/mtl/mtl") {
    ["material_A"] = glitterA,
    ["material_B"] = glitterB,
    ["mask"] = bind(noiseMap, 1.0),
    ["fallback_glitter_space"] = "object",
}
Or doing it in a single material:
local twoStyles = DwaMetalMaterial("/Scene/surfacing/mtl/twoStyles") {
    ["metallic_color"] = Rgb(0.2, 0.21, 0.3),

    ["show_glitter"] = true,
    ["glitter_space"] = "object",
    ["glitter_density"] = 12.0,

    ["glitter_style_A_frequency"] = bind(noiseMap, 1.0),
    ["glitter_size_A"] = 0.1,
    ["glitter_color_A"] = Rgb(0.15, 0.1, 0.8),

    ["glitter_style_B_frequency"] = bind(oneMinusNoiseMap, 1.0),
    ["glitter_size_B"] = 0.2,
    ["glitter_color_B"] = Rgb(0.15, 0.1, 0.8),
}
Binding and Artifacts
The best case for this glitter is when the material has small flakes that don’t vary in size or density across the surface.
Below is a close-up of the two-style layering from earlier.
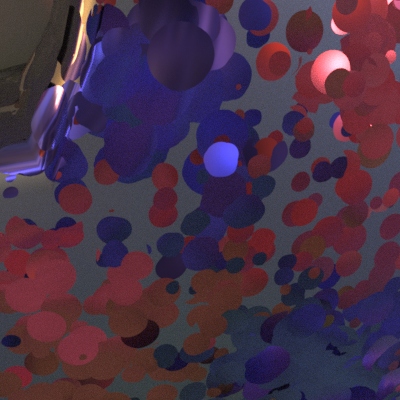
Notice that some of the flakes are not perfectly circular; parts are cut off. The smaller the flake size, the less noticeable artifacts like these become.
While a number of parameters are bindable or blendable, varying some of them can cause an undesirable appearance. This happens because glitter is based on cell noise, and deforming the underlying cells deforms the flakes.
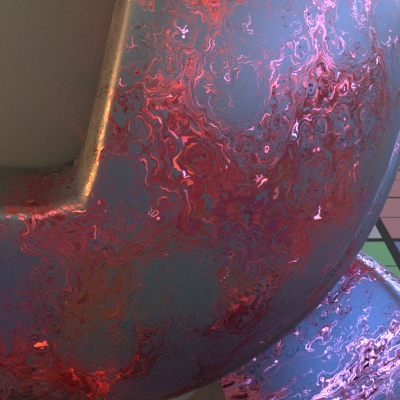
Above: controlling size and density via noise creates an unusual result
When trying to make a very specific distribution of glitter in a material, such as having sparse and large circular flakes in one area while having fine and dense flakes in another, a texture solution is more appropriate.
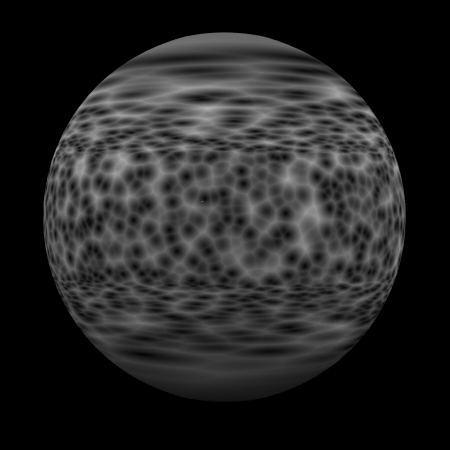
Left: the underlying noise, right: corresponding glitter